
Use Projects to keep a job's budget, milestones, clients, team and timesheets in one place. The pictures in this guide use example projects, not real ones.
Find a project
- Select Projects in the sidebar.
- Choose a status tab: All, Planning, Active, On Hold, Completed, Cancelled or Archived.
- Narrow the list with Priority, Client or Search projects....
- Select a project to open it.
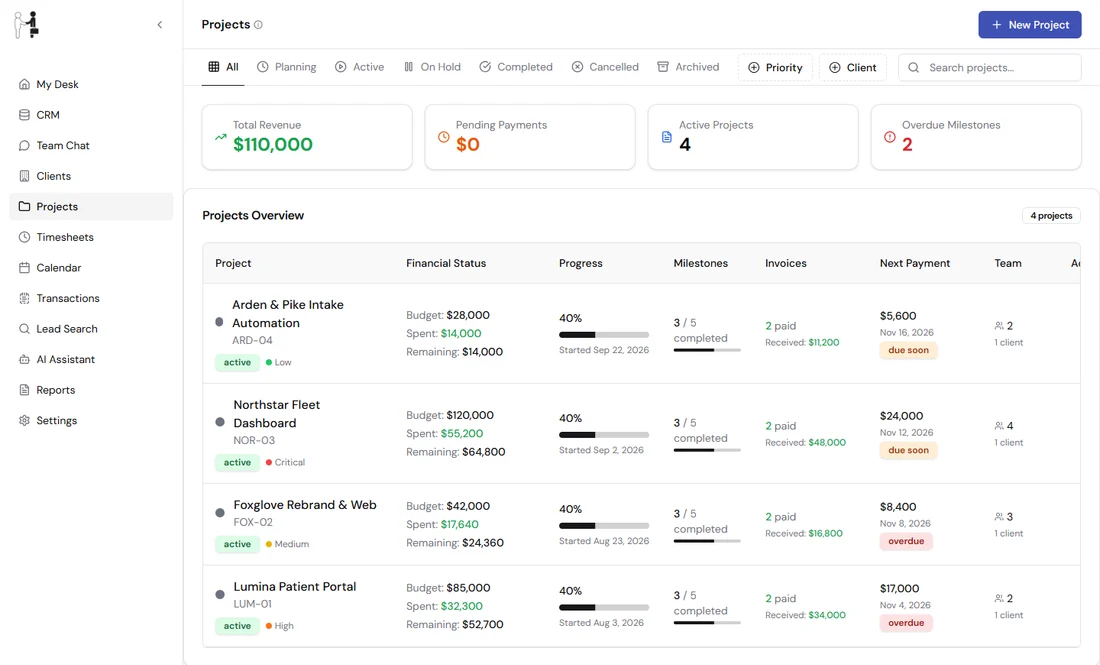
Figure 1. The cards at the top show total revenue, pending payments, active projects and overdue milestones.
Each row shows the project's budget, spending, progress, milestones, invoices, next payment and team. Select the three-dot menu at the end of a row for View Details, Edit Project, View Finances or Delete Project. View Finances opens the project's overview.
Create a project
- Select New Project.
- Enter a Project Name and a Project Code. The code can use uppercase letters, numbers, hyphens and underscores, up to 50 characters. Every project in your organization needs its own code.
- Add a Description, Start Date, End Date, Estimated Budget and Currency if you want them.
- Open Assign Clients and Assign Team Members and pick from the people who already exist.
- Select Create Project. You see Project created successfully.
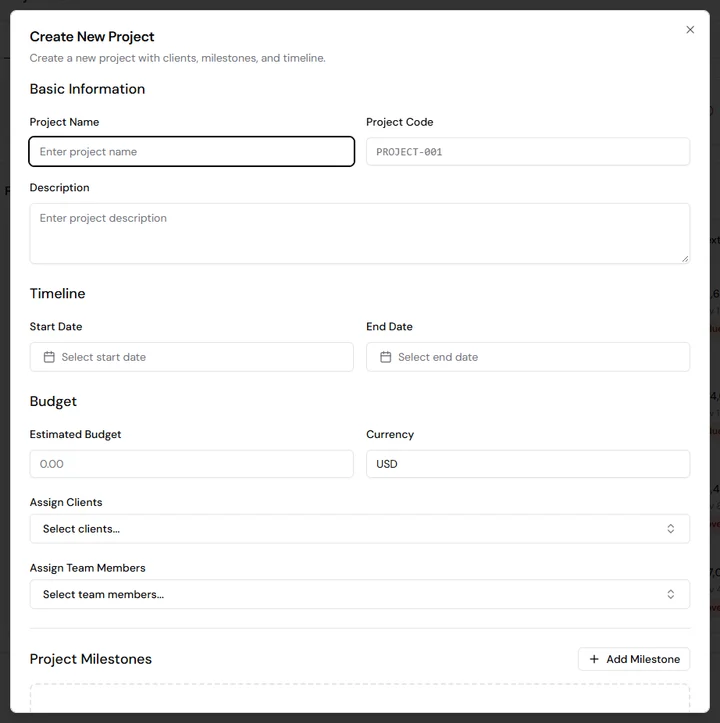
Figure 2. Only the name and code are required.
The form also has Add Milestone under Project Milestones, but it is safer to leave that and add milestones afterwards from the project's Milestones tab (see below). If you create an invoice from the New Project form and its number is already taken, you see an error, but the project and milestone may already be saved without the invoice.
If the project code is already used by another project, the project is not created. Choose a different code.
Review a project
Open a project to see its name, status, priority, team size and start date. These tabs sit below the heading:
- Overview: budget, amount spent, workflows, team and upcoming milestones.
- Transactions: the project's income, expenses and invoices.
- Milestones: the budget phases (see below).
- Files, Timeline and Calendar: documents, activity over time and project events.
- Clients, Team and Timesheets.
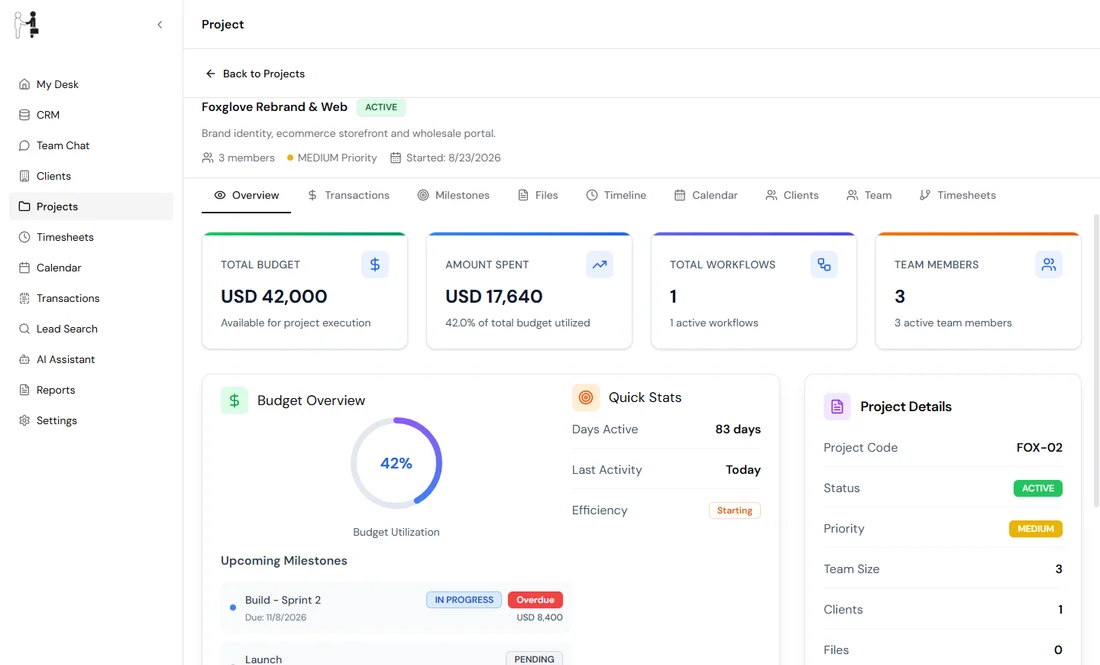
Figure 3. Check the heading to confirm which project you are in. Select Back to Projects to leave.
Change or delete a project
To change a project, open its row menu and select Edit Project. You can change the name, description, status, priority, dates and budget. The Project Code is locked once the project exists. Select Update Project, and you see Project updated successfully.
To delete a project, select Delete Project in the row menu and confirm. This permanently deletes the project, its milestones, files and activity history, and cannot be undone. Your clients and team members are not deleted. Invoices, transactions, workflows and recorded time stay in your records but are no longer linked to the project.
Plan budget milestones
Open Milestones. Each milestone is a phase of the job, with a budget, a due date and two labels: its work Status (Pending, In Progress or Completed) and its payment status.
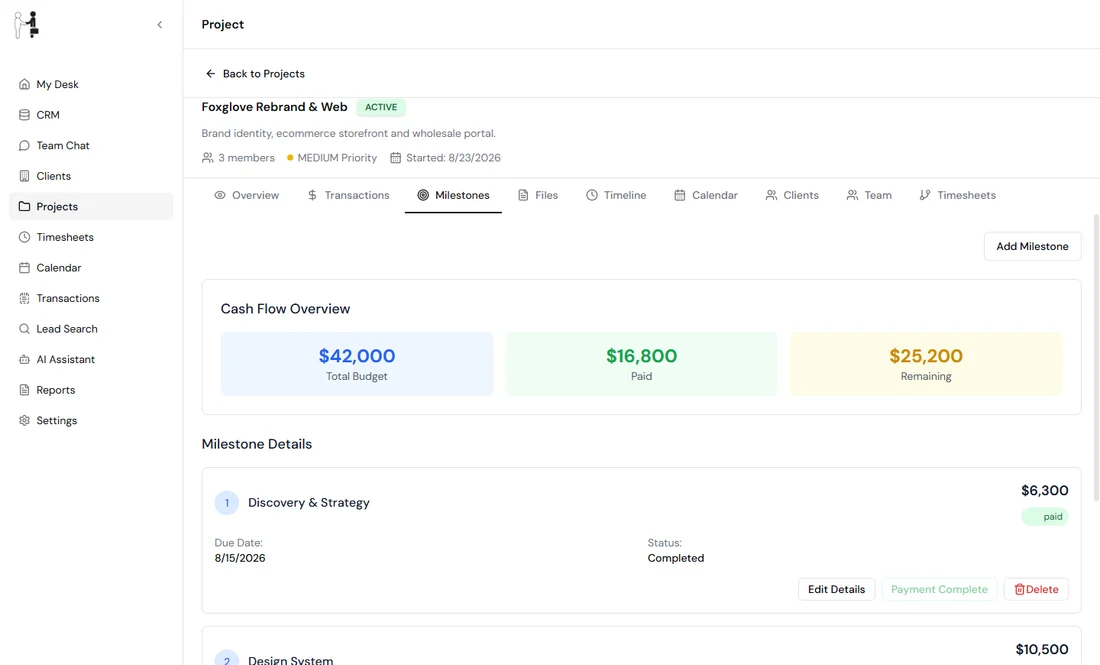
Figure 4. Cash Flow Overview compares the total budget with what has been paid.
- Add Milestone: enter a name, budget amount and due date. You can also add a start date and a description, and choose Create Invoice for this Milestone.
- Edit Details: change the name, dates, budget and work status.
- Update Payment: enter the Paid Amount and Payment Date, and choose a Payment Status: Not Invoiced, Invoiced, Partial Paid, Paid or Overdue. The amount is the total paid so far, not an extra payment.
- Delete: removes the milestone after you confirm.
Payment statuses are labels you set yourself. They do not send an invoice or collect money. The first time you open Milestones on a project with none, you see Budget Milestones Setup, which warns you with Budget Exceeded if the amounts go over the project budget and will not save until you fix it. After that, Add Milestone does not check the total, so keep an eye on the amounts yourself.
A milestone that has an invoice cannot be deleted. You see Cannot delete milestone with associated invoices. Please delete or unlink invoices first. Delete the invoice under Transactions, then delete the milestone.
Add clients and team members
Open Clients and select Add Client. Choose a Client, add a Role (Optional), and select Add Client. To take a client off the project, select the trash button on its row and confirm. The client's own record stays in Clients.
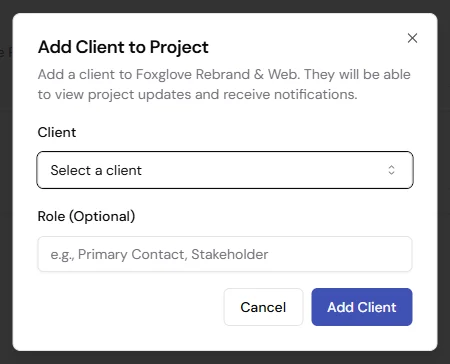
Figure 5. Only existing clients can be added.
Team works the same way. Select Add Member, choose a Team Member and a Role, and select Add Member. Removing a member from the project does not remove them from your organization.
Find a project's timesheets
Open Timesheets inside the project. Use Search timesheets... and the status and sort controls to find one, then select its card to open it in time tracking. Time Entries shows the recorded time instead of the timesheet cards. Select New Timesheet to add one.
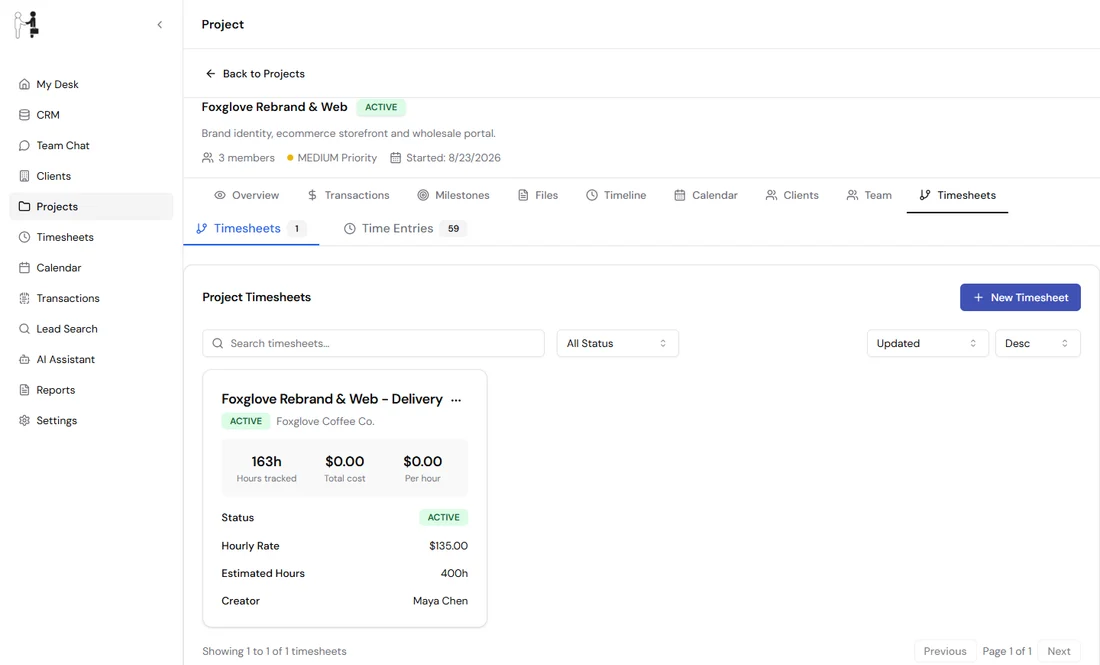
Figure 6. Each card shows the hours tracked, rate and estimate.